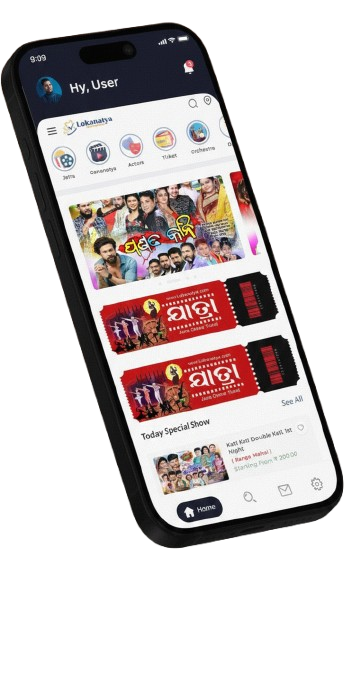
Phase 1
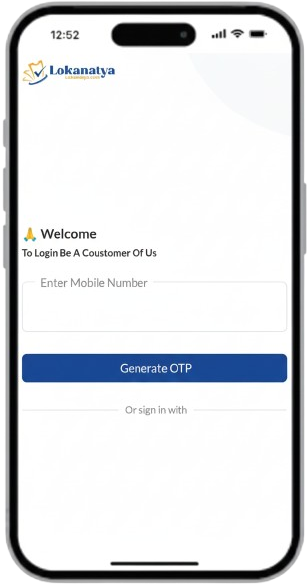
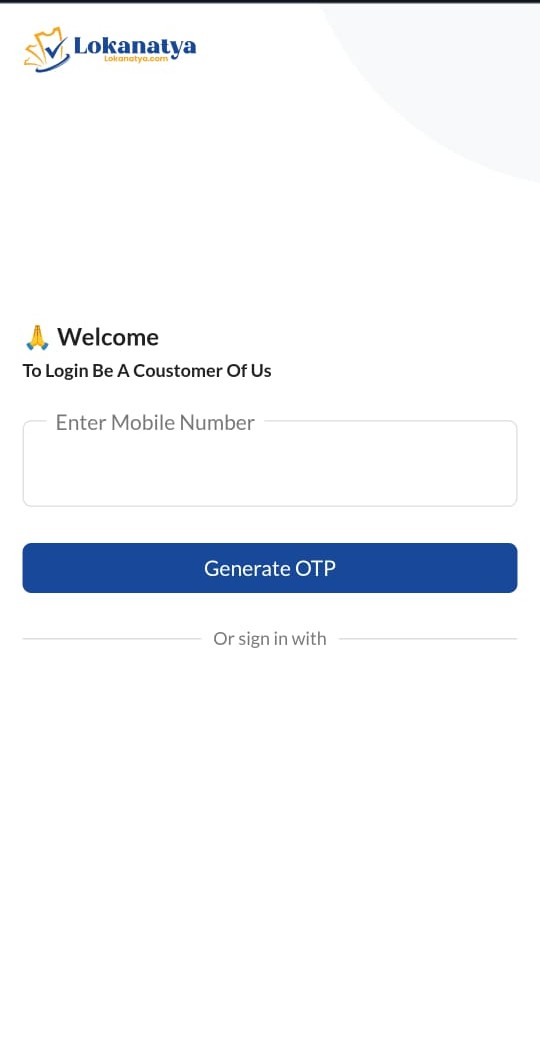
Sign up and secure your account
Start your journey with a quick and simple sign-up process.
Just enter your valid mobile number, and we’ll instantly send an OTP (One-Time Password) to verify your identity.
This fast and secure verification ensures that only you can access your account, giving you a safe and personalized booking experience from the very first step.
Phase 2
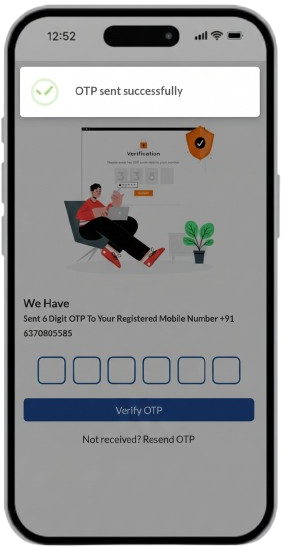
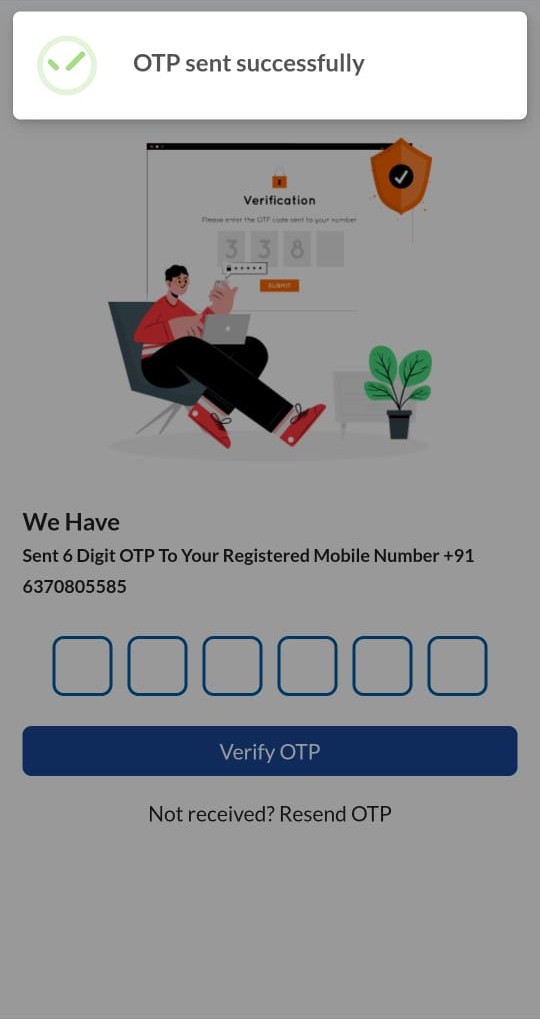
Verify Your OTP
After entering your mobile number, you will instantly receive a 6-digit OTP on your registered phone.
Simply enter the OTP to verify your identity and continue.
This step ensures that only you have access to your account, keeping your booking information safe and secure.
With quick OTP verification, you can proceed to explore and book your favorite Jatra shows without any delay.
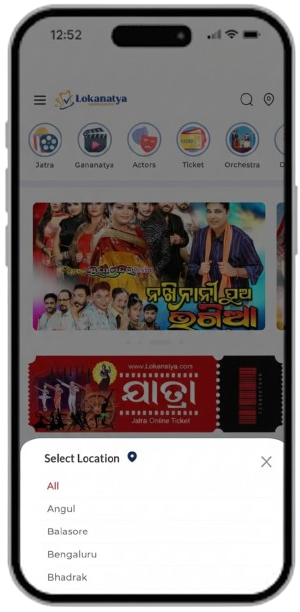
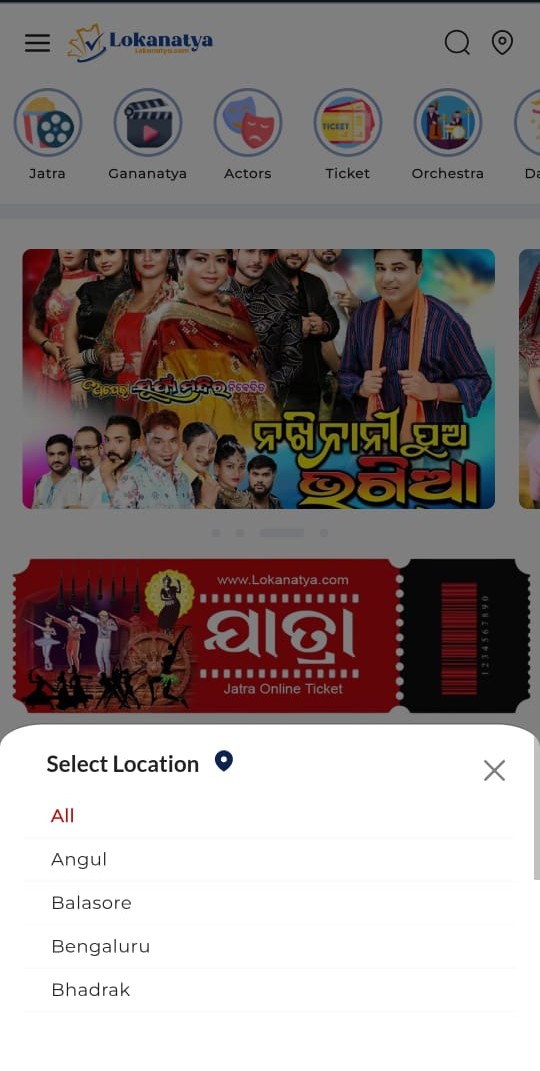
Phase 3
Choose Your Location
Select your preferred city or district to explore Jatra shows happening near you.
Simply pick your location from the list, and the app will instantly display all available Jatra programs, timings, and ticket options in that area.
This helps you discover shows more easily and ensures you get the most accurate and nearby Jatra listings.
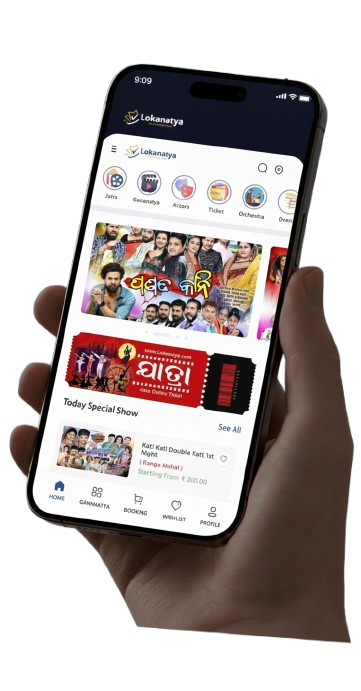
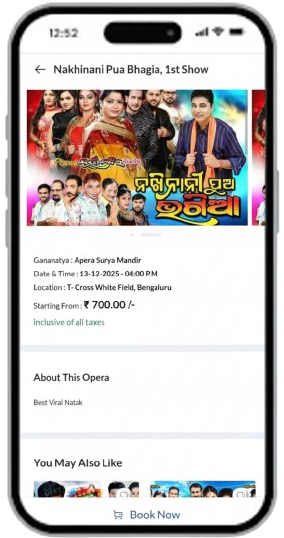
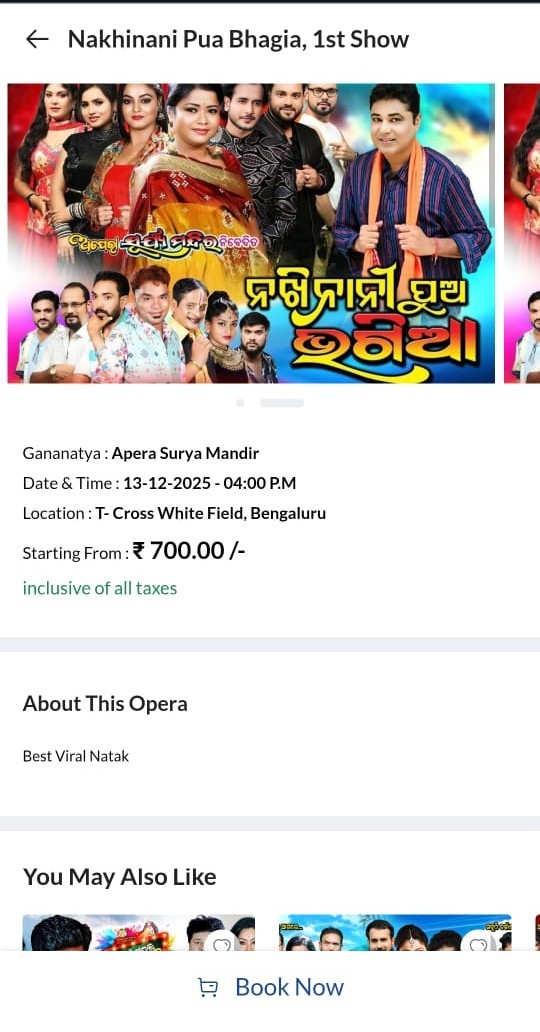
Phase 4
View Opera Details & Start Booking
After choosing your location, explore detailed information about each Jatra opera.
Check the show name, date & time, location, ticket pricing, and full description—all in one place.
This page helps you understand the performance before you proceed further.
Once you're ready, simply tap “Book Now” to move to the seat selection and complete your ticket booking.
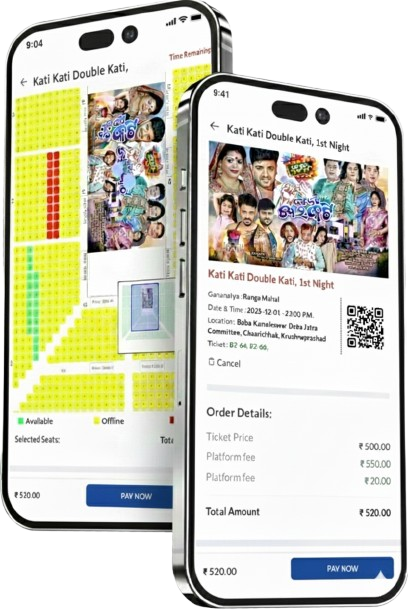
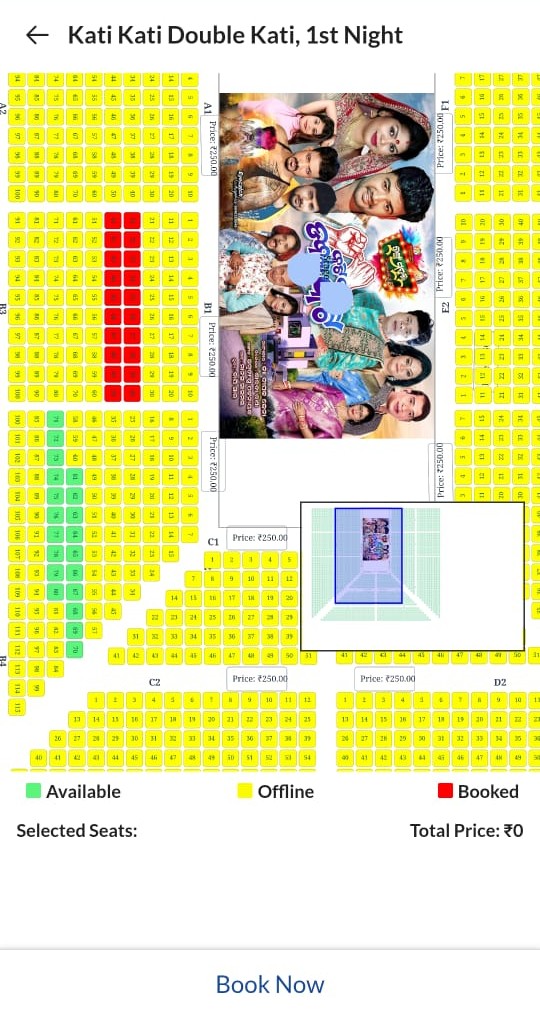
Phase 5
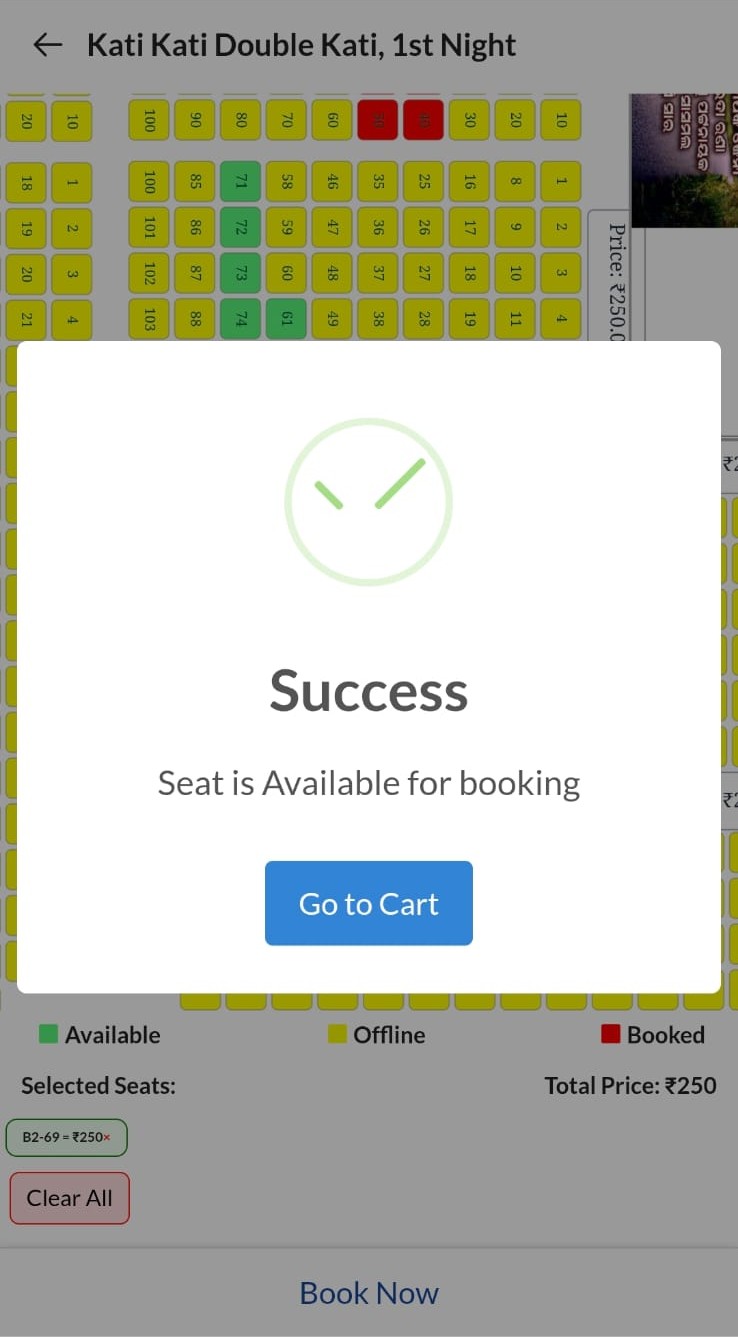
Select Your Seats & Proceed to Payment
After choosing the opera and tapping “Book Now,” you’ll reach the seat selection screen.
Here, you can clearly view the seating layout, including available, booked, and offline seats.
Zoom in, explore the seating blocks, and pick the seats that suit your comfort and preference.
Once your seats are selected, the total price is calculated automatically.
When everything looks perfect, tap “Continue” to move ahead and complete your secure ticket payment.
Phase 6
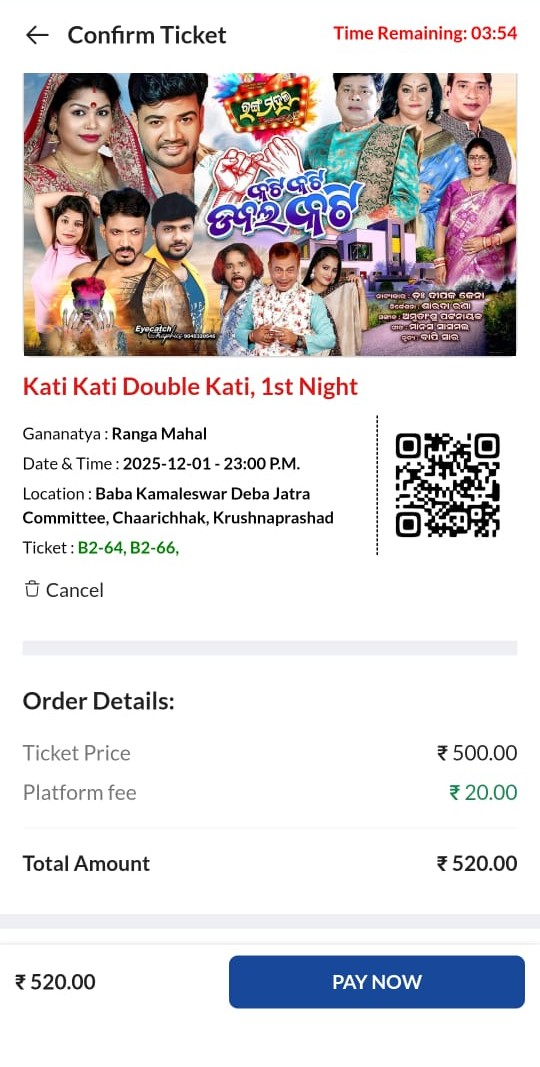
Review Your Ticket & Make Secure Payment
After selecting your seats, you’ll be taken to the ticket confirmation page.
Here, you can review all important details—show name, date & time, location,
selected seats, and the final price breakdown including the platform fee.
This step ensures everything is correct before you proceed.
A countdown timer helps you complete the payment within the allotted time
so your seats remain reserved.
Once you’ve confirmed the details, tap the **“Pay Now”** button to complete your booking securely
and move to the final confirmation stage.
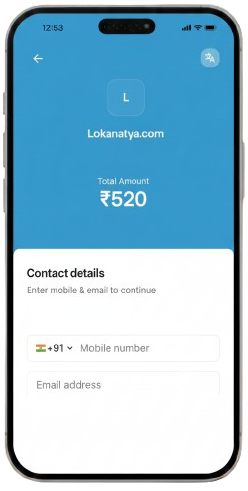
Phase 7
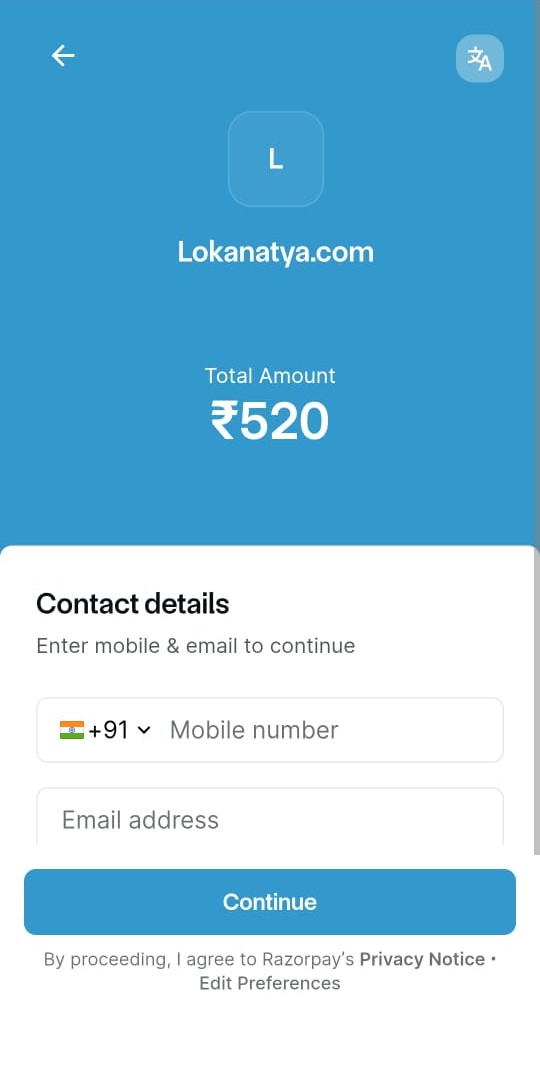
Enter Contact Details & Proceed to Payment Gateway
In this step, you’ll be redirected to the secure payment gateway.
Before completing the transaction, you are asked to enter your mobile number
and email address. These details help us send your e-ticket, payment receipt,
and important booking updates instantly.
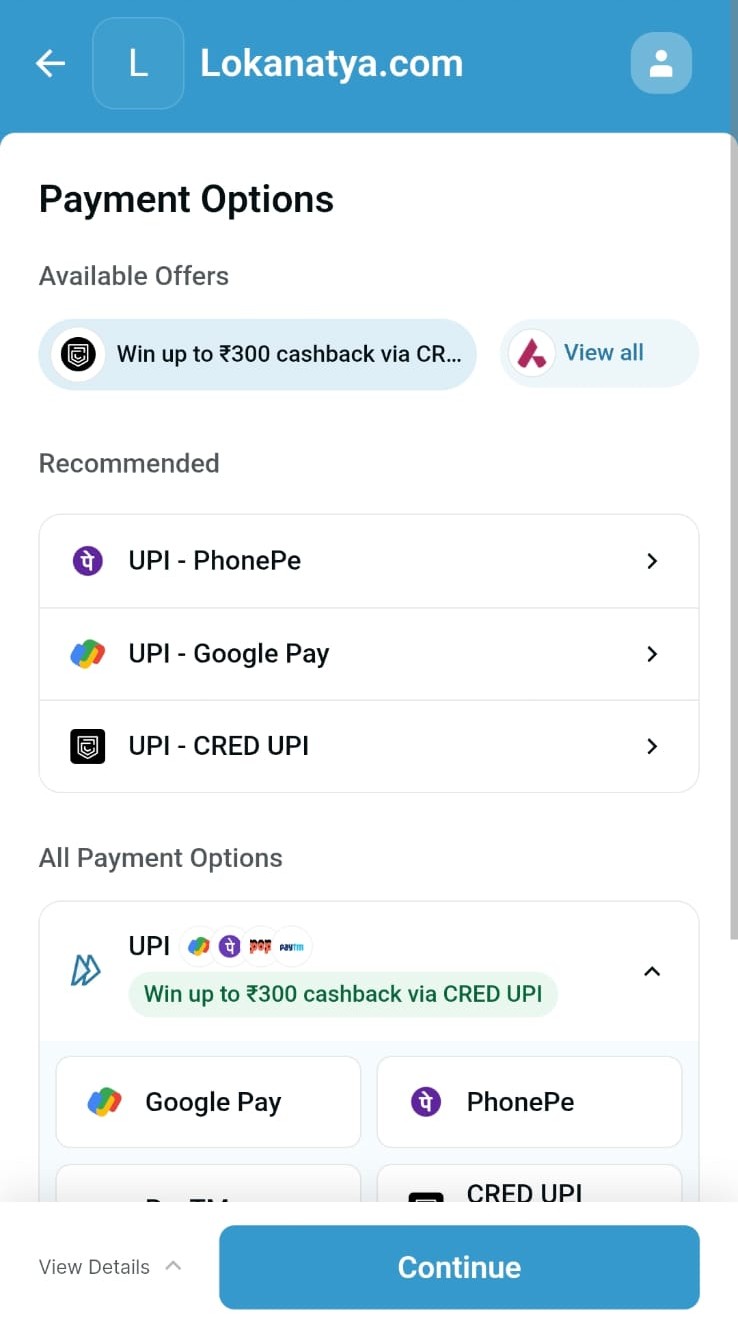
After entering your contact information, you can continue to your preferred
payment method and finish the transaction safely.
This step ensures a smooth and verified checkout experience.
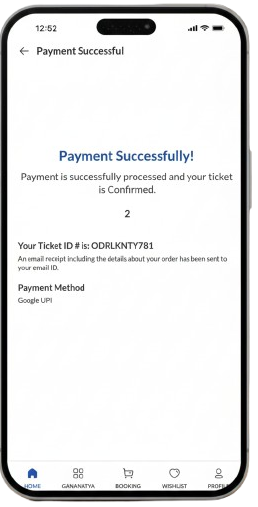
Phase 8
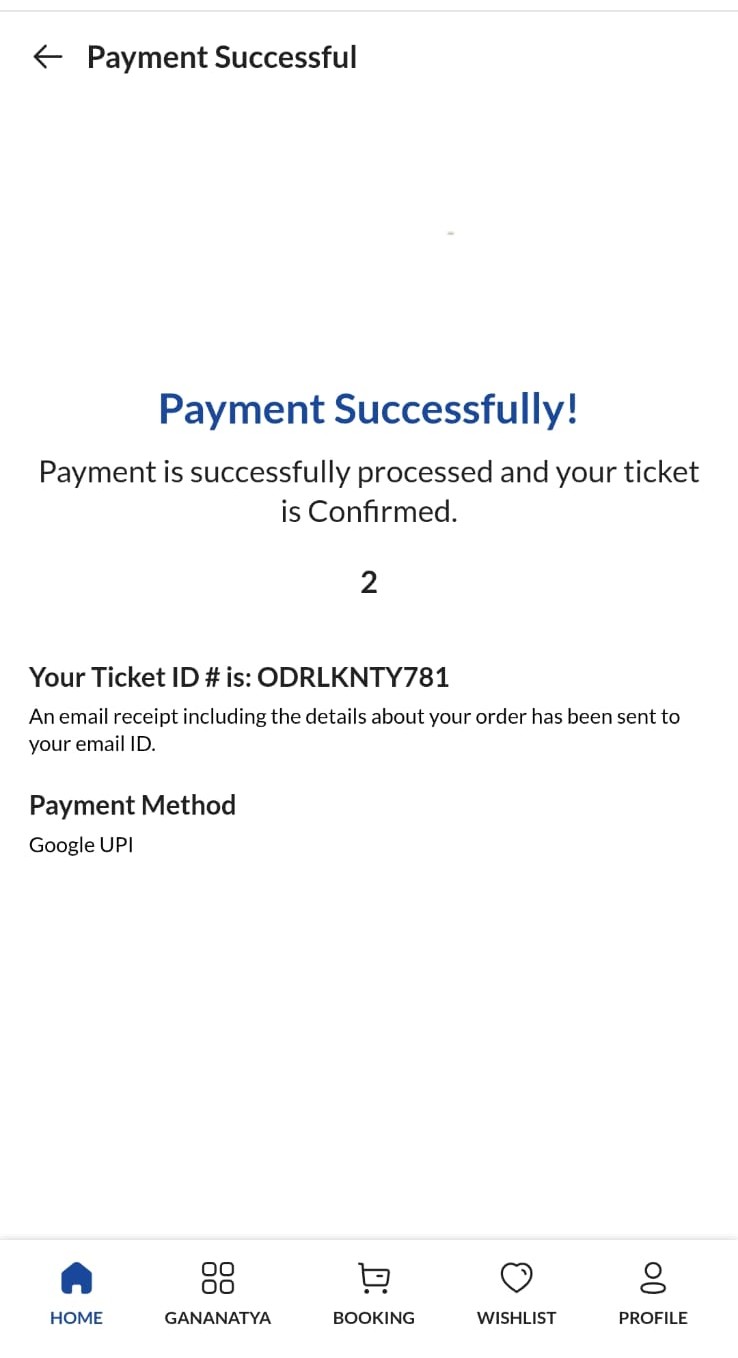
Payment Confirmation & Ticket Issuance
Once your payment is successfully processed, you will receive a confirmation message like the one below:
Ticket ID: A unique identifier for your booking.
Payment Method: Details of the method used for payment.
Receipt: An email with your e-ticket and payment receipt will be sent to your email address.
This final step ensures that your booking is complete, and you can now enjoy the benefits of your confirmed ticket!
Phase 9
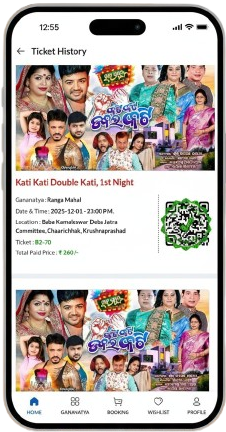
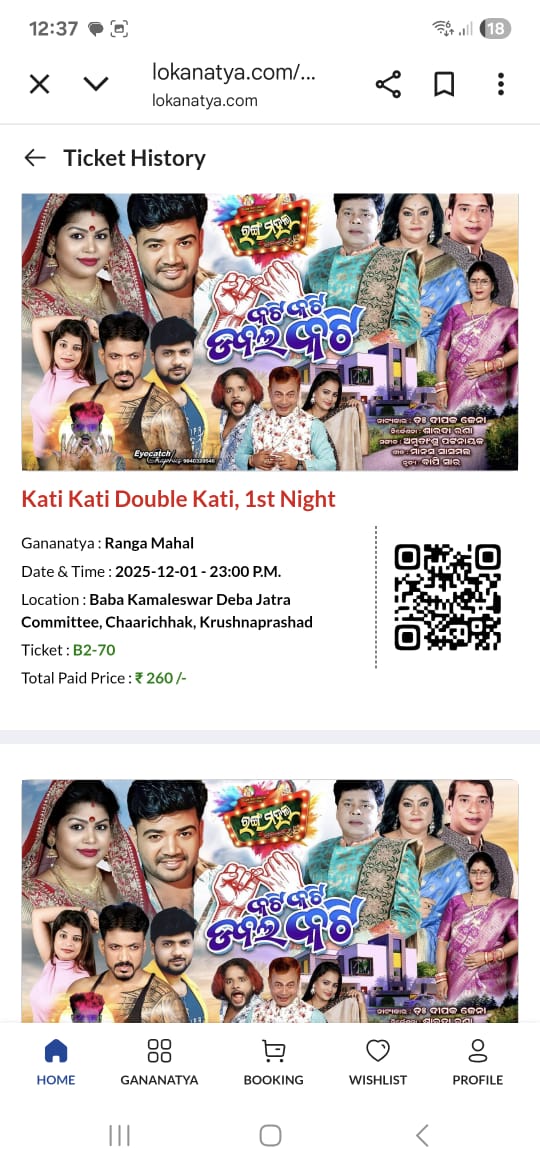
View Your Ticket in Booking History
After your ticket has been successfully booked, you can easily access all your
booking details in the Ticket History section.
Each ticket entry is displayed clearly, allowing you to view, scan, or show
your ticket at the venue without any hassle.
This step ensures that all your past and upcoming bookings are stored securely
in one place, making it easy to access them whenever needed.
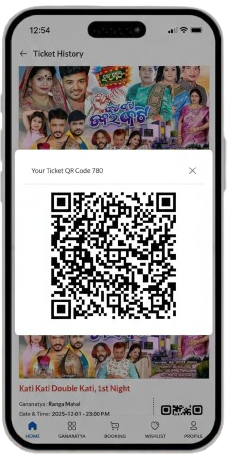
Phase 10
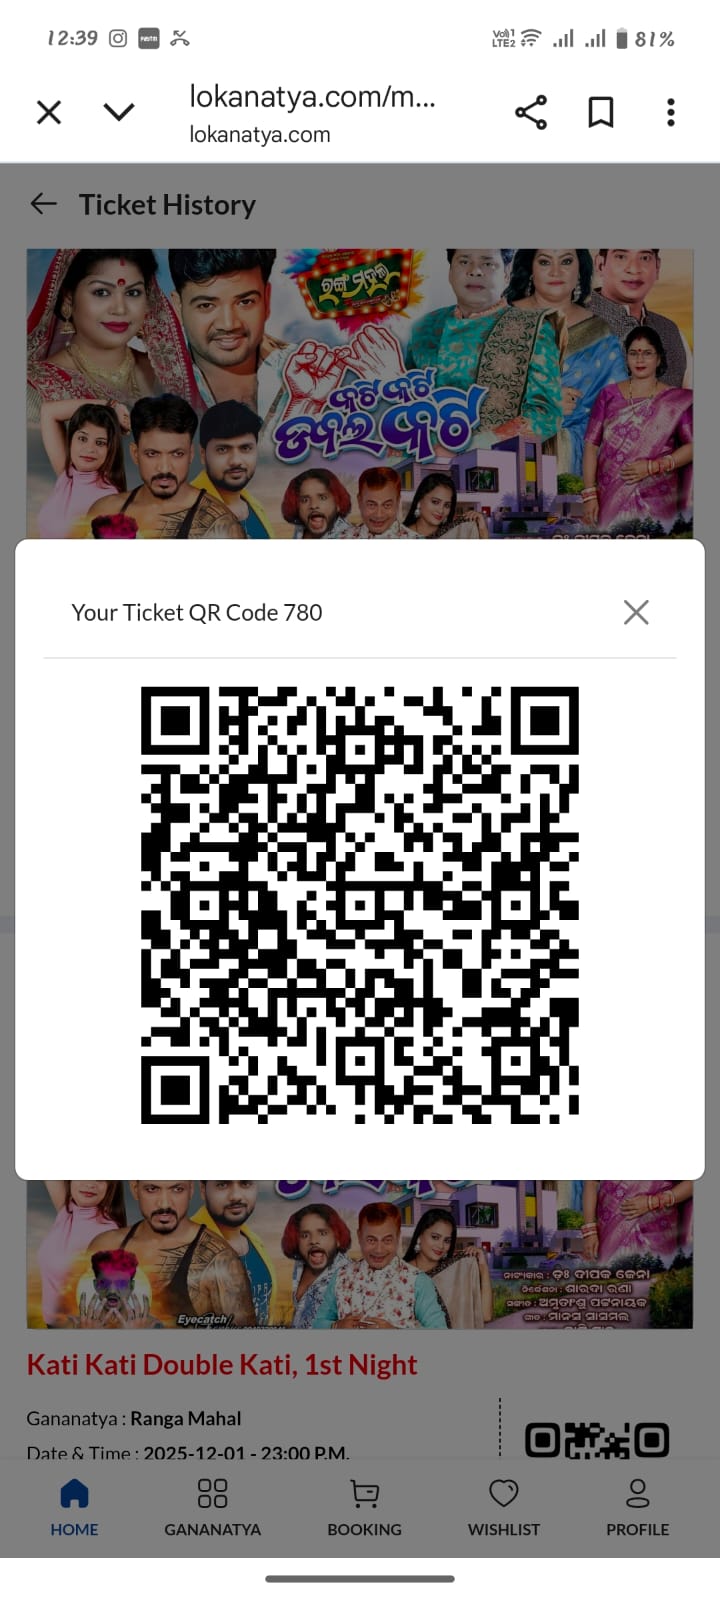
Show Your QR Code for Entry Verification
At the venue entrance, simply tap on your booking from the Ticket History
section to open your unique QR Code, as displayed on the screen.
The event admin will scan this QR code to verify your ticket details, such as:
• Ticket ID
• Event name & date
• Payment confirmation
• Ticket type & seat (if applicable)
Once your QR code is successfully scanned, you will be granted entry to the event.
This step ensures a fast, secure, and paperless entry experience for all visitors.
Keep your QR code ready for a smooth check-in process at the gate.
Phase 11
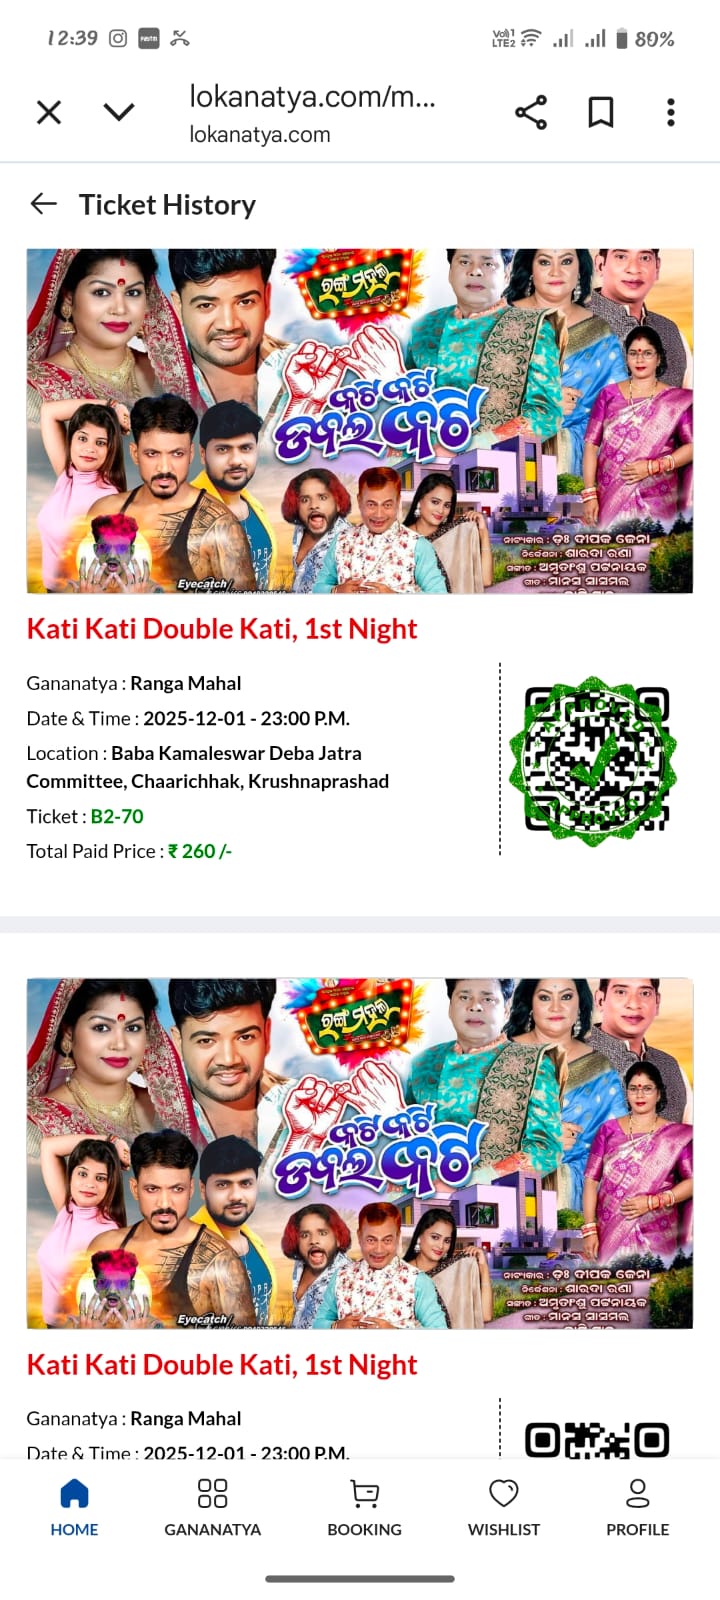
After Scan Confirmation & Enjoy the Show
After your QR code has been successfully scanned, you will be granted entry to the event & the ticket will be automatically a approved by the admin and a stamp will be added to your ticket.
After this the qr code will no longer be valid for re-entry.
Enjoy the Jatra performance and have a great time!